Blown Egg Easter Decorations in Collaboration with artist, Marisa Dixon
We’ve collaborated with artist Marisa Dixon to create attractive decorations that will make your home look Eggstraordinary over the Easter period.
Getting Started with Easter Decorations: How to Blow Eggs
- First, you’ll need to gather some household supplies. Some people will tell you that you need special egg-blowing tools, but this is a lie! You just need a hair pin and a paper clip.
- You can also try a plastic medicine syringe, the type you’d use to give medicine to a child. You’d need quite a wide one, and in a minute, we’ll show you how some drill bits come in handy as well.
- If you’re going to save the inside of the egg for cooking, make sure to wash the outside of your egg and ensure that all the tools you are using are clean and sanitized.
- Place your eggs in a bowl of warm water for about 10 minutes before starting. This will make the entire process much easier. Hold an egg firmly (as firmly as you can hold an egg) and use your pin to gently pierce a hole in one end. It helps to gently twist the pin back and forth first to sort of screw it in before you push it through, repeat on the other end of the egg.
- Once you have a tiny pin hole, it helps to have a small drill bit (the smallest one in the set). Gently “drill” through your pin hole to enlarge it.
- Now grab that paper clip and unfold it. Stick the paper clip inside the egg and swirl it all over the place. The object here is to break up the egg yolk up which will help it all come out easily.
- Next, you’ll need your plastic medicine syringe. If you don’t have one in your home, you can get one at the Pharmacy quite cheaply. Place it directly over one of the holes and squeeze over a bowl. The egg will come right out of the other end. If you meet any resistance, don’t keep blowing air or your egg might crack or explode. Give it a shake, stick the paper clip in again, or increase the size of your hole.
- Once everything is blown out, you might want to fill your syringe with warm water and blow it into the egg. Shake it up and then blow it out to get the inside clean.
Decorating your Egg for Easter
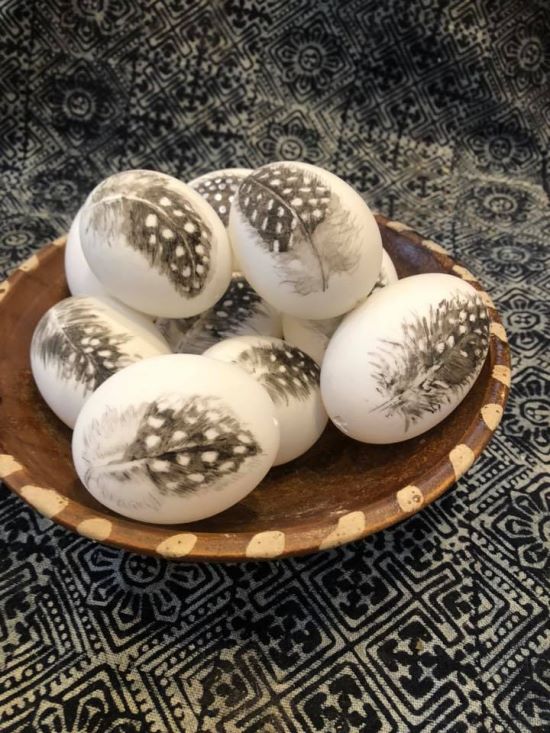
- Once you’ve got your egg shell clean and dry, you’re over half way there! Choose a design that you love and sketch it out roughly on the egg with a pencil. Once you’re ready to take the plunge, start painting your eggs with water based acrylic paint. You could paint all your eggs the same or mix it up with different designs.
- Voila! You’ve created a selection of beautiful hand painted eggs! Try putting them in a decorative dish that complements your style and interior.

Using your designs to decorate your home at Easter
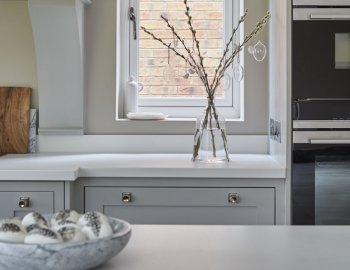
We created a minimal Scandinavian feel with shades of grey and whites paired with a luxurious marble dish and placed them in the kitchen next to our VEKA uPVC windows! - The light brings out the colours and enhances the beautiful designs.

We created an additional Easter tree to display with our eggs. To make our Easter tree it really was very simple! We bought some Pussy Willow stems from a local garden centre, placed them in a vase and decorated them with transparent egg baubles and miniature white bird baubles.
Lastly, you know how much we love seeing your projects- so post them on our Facebook page so we can see your eggcellent creations!


